You open your Messages app and are immediately overwhelmed by the sheer number of conversations. There are threads with friends from years ago, old group chats that fizzled out, and countless one-time messages from delivery drivers or verification codes.
You want to clean up your inbox, but you’re a little hesitant to hit “delete.” What if you need to go back and find that one specific message from a former colleague? Or that receipt from a service you used months ago?
I’ve faced this exact problem, and I know the frustration of feeling like you’re caught between a cluttered inbox and the fear of losing important information. On a platform like Gmail, archiving is a simple, built-in feature. You move an email out of your primary inbox without deleting it, and it’s there whenever you need to search for it.
The problem is, Apple doesn’t offer a native “archive” button for messages on the iPhone. I’ve spent a lot of time searching for a simple solution, and the truth is, a direct archive function doesn’t exist. This can be confusing, so I want to clarify what’s possible and what the best workarounds are to help you achieve that clean, organized feeling.
The Truth About Archiving on iPhone
When you ask, “How To Archive Text Messages On iPhone?” the most accurate answer is that you can’t, in the traditional sense.
The button you’re looking for simply isn’t there. Apple’s Messages app is designed to be a real-time communication tool, and its primary functions are sending, receiving, and, if you need to, deleting messages.
However, just because there isn’t a single button doesn’t mean you’re out of options. You just have to be a little creative.
The goal of archiving is to remove a conversation from your main view without losing the data, and there are several ways to accomplish this. I’ll walk you through the most effective methods I’ve personally used, from the easiest to the most comprehensive.
Method 1: The “Manual Archive” (The Best Free Method)
This is my go-to method for decluttering my inbox. It’s essentially a manual way to hide a conversation without deleting it. The key is to leverage your iPhone’s built-in features to achieve the desired outcome.
Step-by-Step Guide:
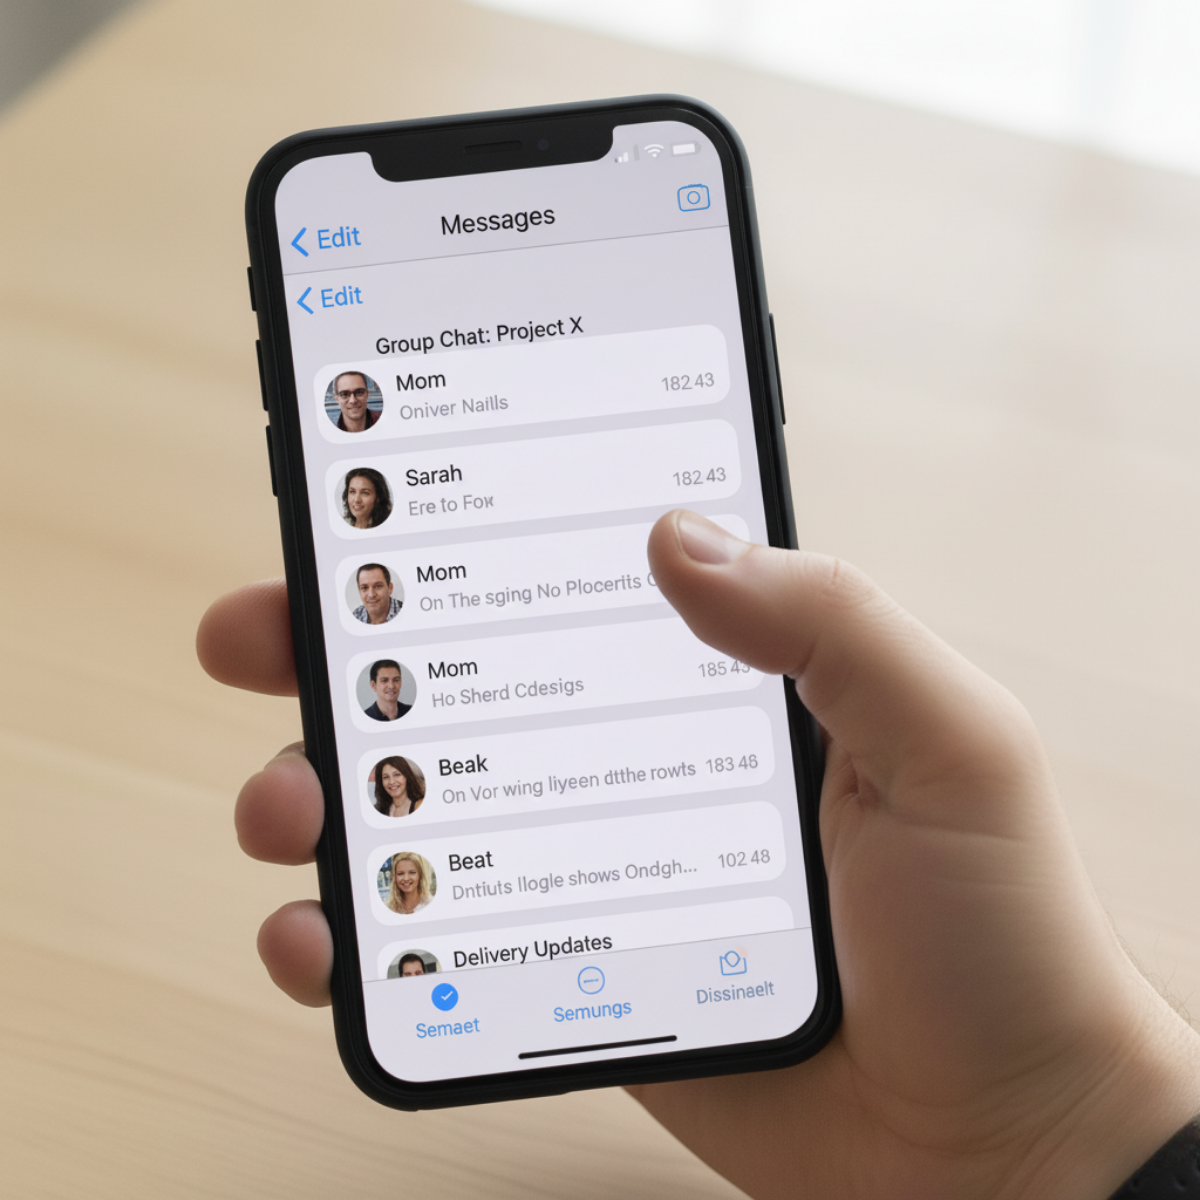
Select the Conversation: Open the Messages app and find the conversation you want to “archive.”
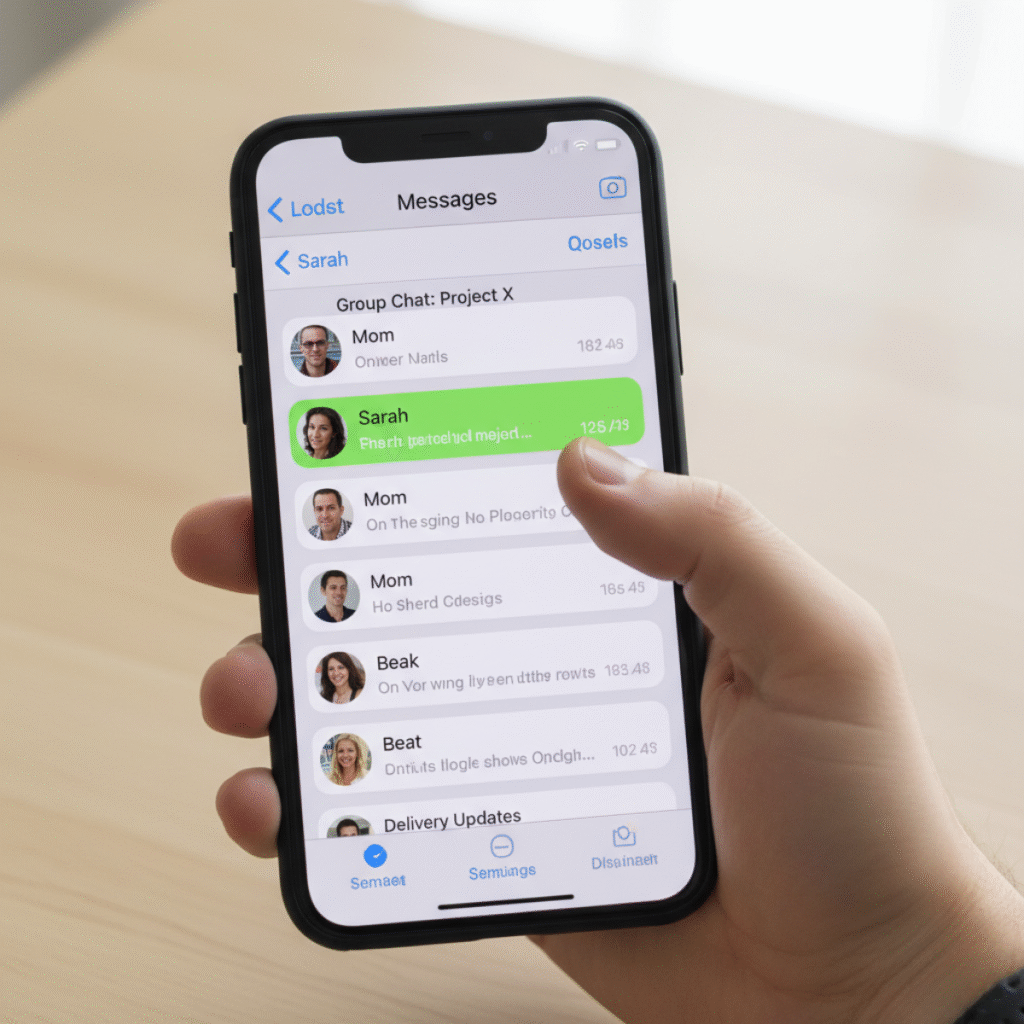
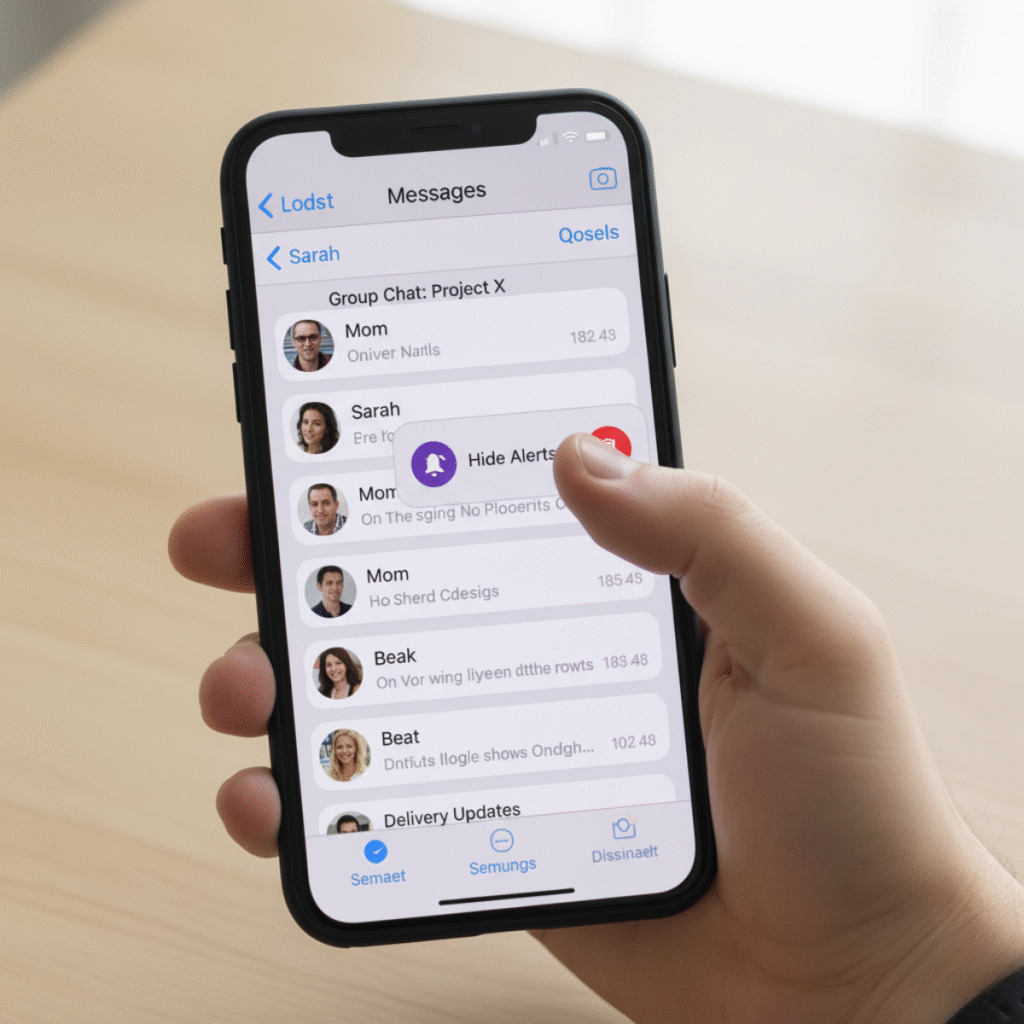
Swipe and Hide Alerts: Swipe left on the conversation. You’ll see two options: “Delete” and a bell icon with a line through it. Tapping the bell icon will turn on “Hide Alerts” for that conversation.
The Hidden Gem: The “Edit” Menu: This is where the magic happens. Tap on the “Edit” button in the top-left corner of your Messages app.

Select and “Filter” Conversations: Tap “Edit” and then “Select Messages.” Now, a new option will appear at the bottom of the screen. I will select the conversations I want to hide. Once selected, I’ll hit “Delete” to remove it from my primary view.
Now, before you panic, you aren’t actually deleting it. This is a bit of a misnomer on Apple’s part. What you are doing is hiding it. The conversation is still stored on your device and will reappear in your main inbox if the person texts you again. This works perfectly for old group chats or conversations with people you don’t frequently communicate with.
This method gives you a clean inbox without the anxiety of permanent deletion.
Method 2: The “Export and Store” Method
This is for those of you who want a permanent, searchable record of your messages outside of your phone. Think of this as a digital shoebox for your message history. This method is especially useful for important conversations, like business communications or personal milestones you want to remember.
The Tools You’ll Need:
You’ll need to use a third-party app to export your messages. While I’ve tried a few, I’ve had the most success with a tool like iMazing. These are not free, but they are incredibly effective and worth the investment if you need to archive a lot of data.
- Connect Your iPhone to Your Computer: I’ll open iMazing and connect my iPhone via a USB cable.
- Select “Messages”: The app will read my device’s data. I’ll select “Messages” from the list of data types.
- Export the Conversations: I can now select the specific conversations I want to export. The app gives me options to save them as PDFs, text files, or other formats. I personally prefer PDFs because they look clean and are easy to search.
- Store the Files: Once the export is complete, I’ll save the files to my computer or an external hard drive for safekeeping.
Why this is a Great Method:
- Permanent Backup: You have a copy of your messages that is independent of your iPhone.
- Searchable: You can search the PDF or text files for specific keywords, names, or dates.
- Clean Slate: After exporting, you can confidently delete the conversations from your iPhone to free up space.
Method 3: The “Screenshot and Store” Method
This is the most basic, no-cost way to save a short, important message. It’s not a true archive for an entire conversation, but it’s perfect for a single key text.
- Navigate to the Message: Find the specific message you want to save.
- Take a Screenshot: Press the volume up button and the side button on your iPhone simultaneously.
- Save to an Album: Open your Photos app. I recommend creating a dedicated album called “Archived Messages” to keep them organized and easy to find later.
Final Thoughts: Making a Choice
I’ve found that the best approach is to use a combination of these methods. For everyday clutter, the “Manual Archive” (Method 1) is a quick and effective solution that keeps my Messages app clean and easy to navigate.
For truly important information, like legal records or a meaningful conversation, I’ll use a tool like iMazing to create a permanent, secure backup. And for quick, one-off snippets, a simple screenshot is often all that’s needed.
While Apple may not offer a one-click “archive” button, these methods allow you to take control of your message history.
You can have a clean, organized inbox without the fear of losing a single important word. I’ve personally used these techniques to manage my own digital life, and I hope they bring the same sense of peace and order to your phone as they have to mine.
To know more about iPhone Tips & Tricks see my guides.